Proxy access provides students with the ability to grant (and revoke) permission to their parents, guardians, or other third parties to view certain information in their myCamosun account.
How to view and add proxy access
Note: Proxy authorization does not grant a person with Power of Attorney to act on the student's behalf.
1. View/Add Proxy Access
Click on 'Add a New Proxy' from the Select a Proxy dropdown menu.
TIP: Previously added Proxies will display in menu for quick access.

2. Enter your proxy's personal information in the required fields. Add details to other fields, if applicable.
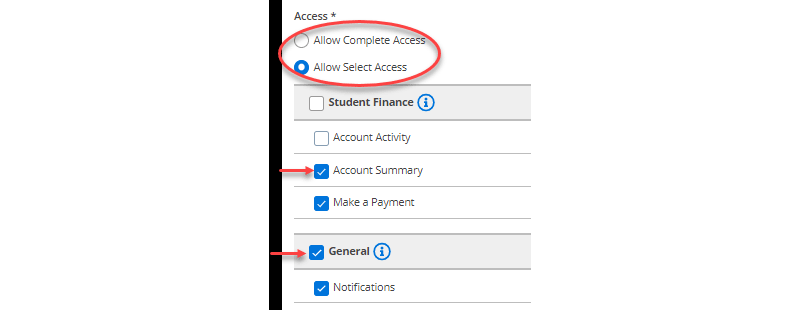
3. Click the "Allow Complete Access" button to auto-select all categories or click the "Allow Select Access" button to de-select categories individually.
TIP: Hover over the blue icon for a description of the information available in each category.

4. Review the Disclosure Agreement. Check the box to authorize disclosure and click "Submit" to add the new proxy.

5. Read the "Add a Proxy Results" dialogue box to confirm your results. Click "Continue" to proceed. Your Proxy will receive an email notification with information about accessing myCamosun.
2. Edit or Remove your Active Proxies
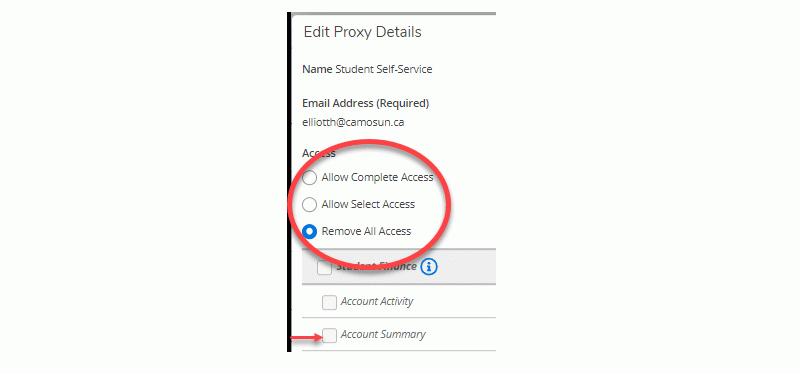
1. Click the edit icon on the far right to make changes or remove access entirely.

2. Click the buttons in the “Edit Proxy Details” pop-up box to change or remove access accordingly. Click “Save” to proceed. Your Proxy will receive an email notification regarding the changes to their access or removal of their access.

3.0 Using Proxy Access
3.1 Select an Account
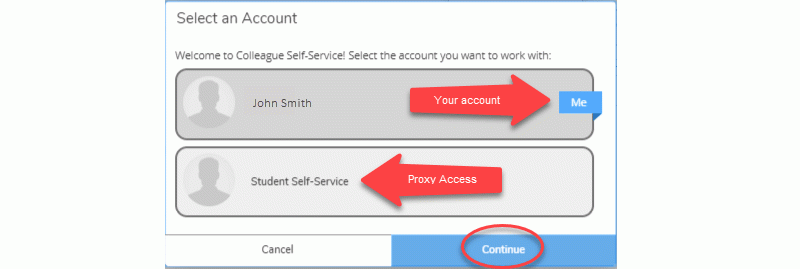
Upon signing in, if you are an existing myCamosun User, the Select an Account dialogue box will display your account and any other accounts you have been granted access to.
- Select the chiclet of the account you want to access and click "Continue"

3.2 Change User
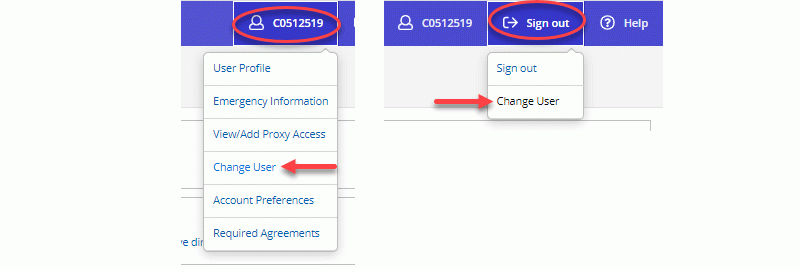
While signed in, if you are an existing myCamosun User, you can change the account you are actively accessing.
1. Click "Change User" in either the User Options or Sign Out Menus

2. See "Select an Account" above